occasionally technical tuesday: 4 exercises to keep your photography chops sharp
 Many times over the years, I've been asked to help friends or readers learn photography -- it is, ultimately, where Occasionally Technical Tuesday got its genesis. One of the reasons I think I've been resistant to doing in the past is because I don't have any formal training in photography: everything I've learned I've done pretty much "on the job," so to speak; therefore in many ways, it's hard to feel like an "expert." Also and honestly, I feel like really, once you've begun understanding the concepts behind aperture, shutter speed and ISO, the rest of photography comes with just taking the camera out and shooting. And shooting. And shooting. It is, I think, the only way to really hone your craft.
Given this, I thought that I'd share with you this week (and in future weeks) a few exercises that I've picked up along the way, to help give you ideas of what and how to shoot next. Consider this post something to use when you're just getting started and you're looking for ideas; or, if you're a seasoned photographer, simple assignments to help you get your photo mojo back if you're feeling a bit stale.
1. Shoot in black and white.

When I first started learning about photography, I enlisted the help of a professional-photographer-friend. Once he helped me buy my camera, he insisted that the first roll of film I ran through it be black-and-white. "That's the way you'll really become a photographer," he claimed. "Colour can hide a multitude of sins. Once you're comfortable in black and white, then you can move to colour."
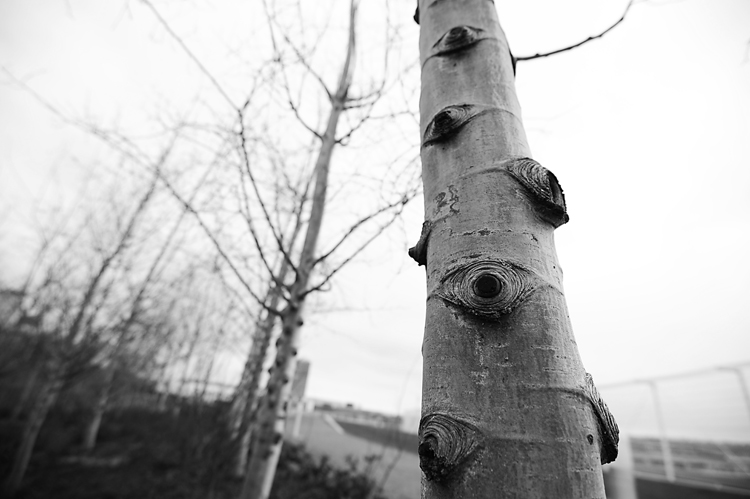
I don't know if I totally agree with him -- I've taken quite a few sinful colour images, myself -- but in some ways, he was right: black and white can teach you about form and texture and contrast in a way that colour photography really can't. For example, in the shots above, you don't notice the colour of the sky or the greenery because you can't; however, what you do notice is the texture of the boulders and the bark of the tree. So if you've been shooting on colour for a while, consider switching to black and white mode, and study the results. You may never shoot in black and white again, but the lessons you'll learn will be ones that you'll consider when composing all of your shots in the future.
2. Once you've got black and white down, focus on colour.
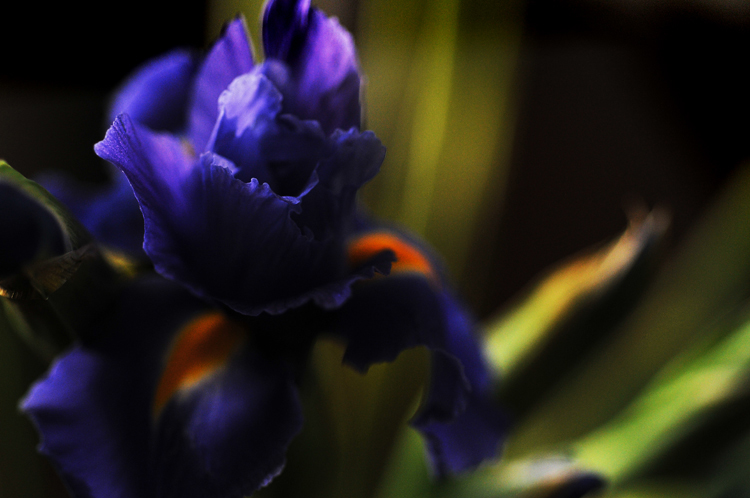

Once you've played with black-and-white photography a bit, switch back to shooting in colour. But I'd suggest actually choosing a colour, and then go out on a photo shoot and try to capture that specific colour in all of your shots. For example, if your chosen colour is purple, shoot as much purple in as many possible locations as you can find -- and notice the different tonal changes, how light can change the hughes, and how the colour "handles" transluscence, or opacity. Create diptychs, like the pair of images, above. This exercise can help you to train your eye to really such out colour as the focal point of your composition, and where the colour repeats itself, for visual interest.
3. Play with the Rule of Thirds.

The "Rule of Thirds" is a general rule of design and photography that says that the eye tends to find images which are slightly off-kilter more interesting than one that is personally symmetrical. For example, for the image of handsome Chance, above, I could've taken the photo so that he was exactly in the middle of the frame, but theoretically, it's a more interesting picture because he isn't.
Make sense?
To be a bit more technical: in order to employ the Rule of Thirds, when I was taking the shot, as I looked through the viewfinder, I divided each dimension of the frame into thirds, both horizontally and vertically, like so:
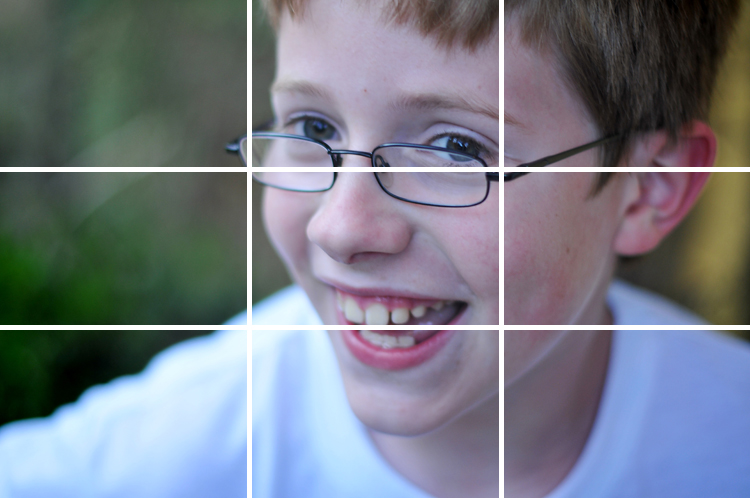
And then, to increase visual interest, I lined up the aspects of Chance that I wanted viewers to pay attention to -- his kind eyes, his mischievous smile -- along those axes, both vertically and horizontally (i.e., his eyes/eyeglass frames line up roughly along the top horizontal line, and his smile on the bottom; similarly, his face is framed, more or less, by the two vertical lines).
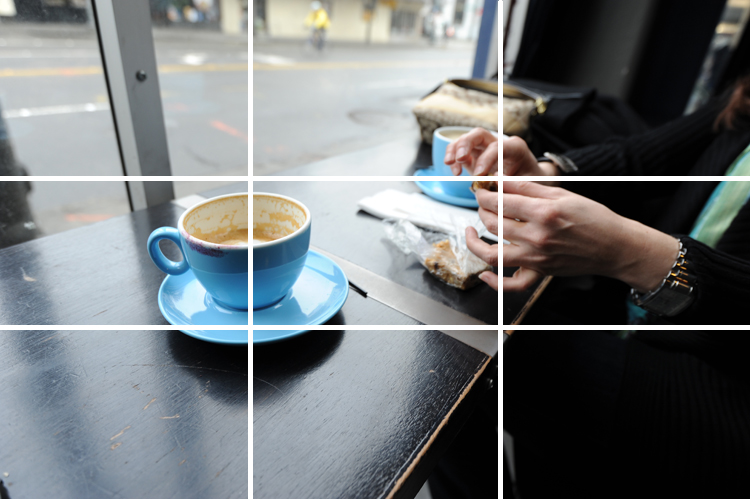
Now obviously, it's sort of impossible to actually draw lines on your viewfinder; however, the idea is just to ballpark it. And this technique works for more than just portraits. For example, in this image taken in a Seattle coffeehouse:

you'll notice that the items I want you to pay attention to -- the blue cup, my friend Victoria's hands, line up along the axes:
The theory is that the photograph is more interesting because of this. (I admit that greater minds might differ.)
Anyway, please note that this "rule" doesn't mean that every shot should be taken on thirds (some shots just work better perfectly symmetrically), but it's a nice little way to force yourself to think about different angles and ways of composing a shot.
4. The 100 paces exercise.
This exercise is great to inspire creativity when you don't have a lot of time or money to travel somewhere fabulous to practice your photography, or you just feel like you might have photographed everything there is to photograph (which is certainly how I feel sometimes). The premise is as follows: grab your camera, walk out the door and go 100 paces in any direction, then stop. Now, take 20 shots of whatever you find in that spot. The point of the exercise is to force yourself to look closely at your surroundings, and find something unusual about your specific location. As an example, yesterday, while I was writing this post, I gave this exercise a whirl. I stopped typing, grabbed my camera, went outside my front door, and walked 100 paces. Here's some of what I found:
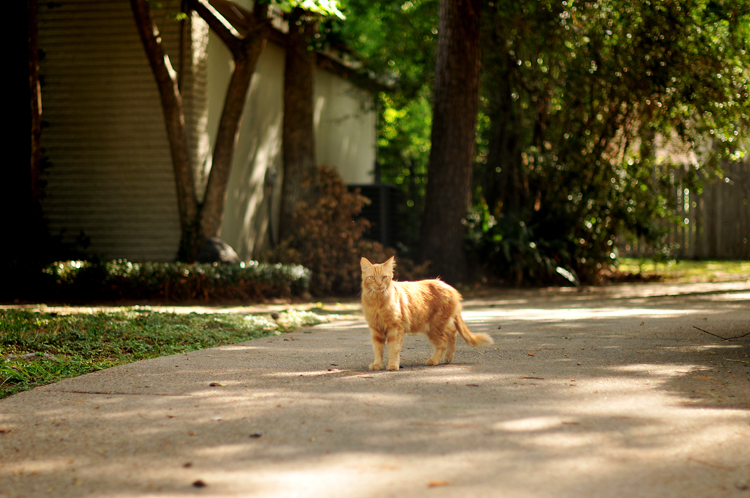

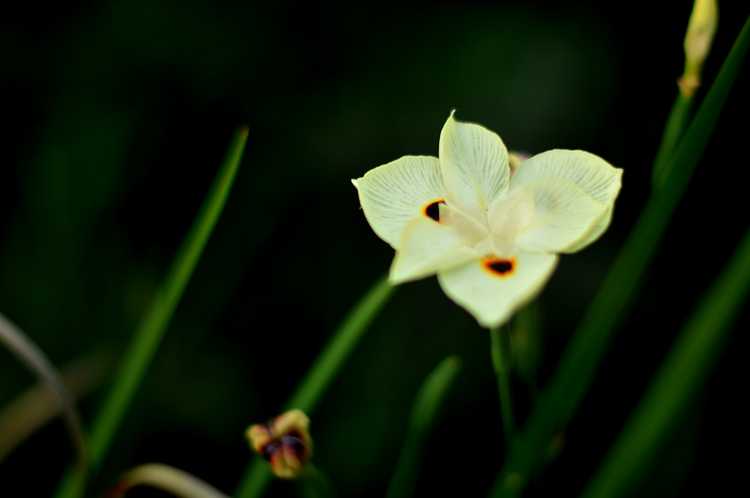

Now, these may not be the best photographs I've ever taken, but that's not the point: the point is to find something different to photograph, and look at things a different way.
I actually do this exercise a lot in capturing images for this blog. And happily, after 4 years of living here in this house, I always find at least something new to shoot.
I hope this helps!. Again, I'll likely share some other exercises in future posts. But for now, happy clicking, friends.
Occasionally Technical Tuesday is a new feature here on Chookooloonks, where we'll tackle topics like choosing a camera, how a camera works, how I choose lenses, how I use Photoshop, how I pack for a photo trip, that sort of thing. You can see an entire index of subjects we've addressed here. I'm no expert, but I'll share what I know, occasionally.
Song: So beautiful or so what by Paul Simon (from his brand new album)